
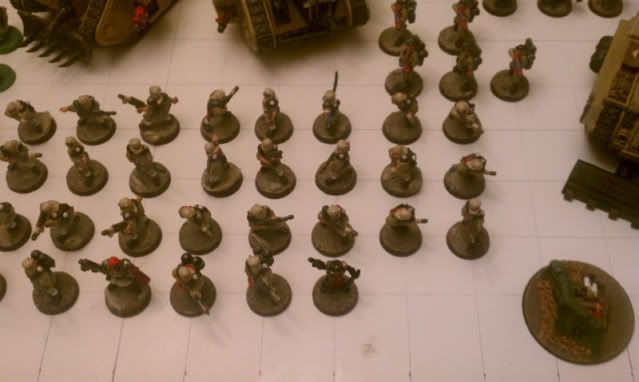
Now the entire army is laid out on the board and positioned along the grid.
Large bases like the Valkyrie and Heavy Weapon teams are traced around with a fine tip sharpie and simple a very simple 'X' is placed where each infantry figure will be:
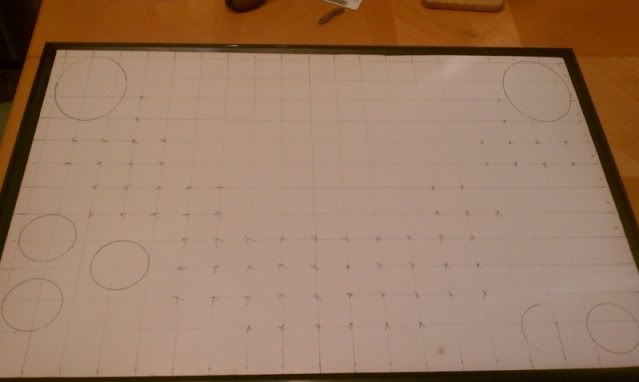
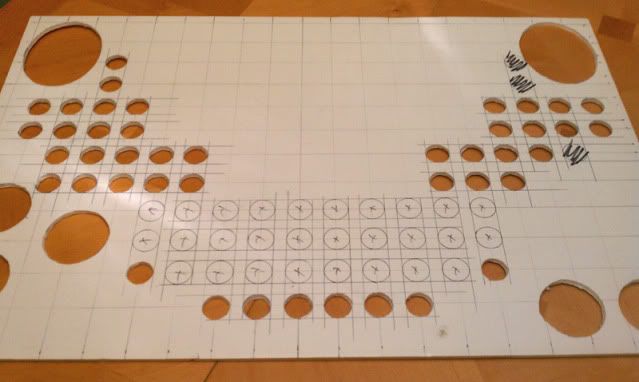
Now the most painful process begins, you will need to add additional lines to each stand where the infantry will be in order to create the squares that the bases will line up against. In the picture below you can see where I drew additional verticle and horizontal lines so that each base will be in-line with the bases behind, in front of, and to the left and right of. Again, this is a super painstaking process but it will ensure that the end result is pleasing to the eye and your infantry don't look like they just got out of the drunk tank that morning. You cann see places where holes have been cut and the circles drawn that are yet to be cut out, and the guide lines I added to make sure its all correctly lined up.
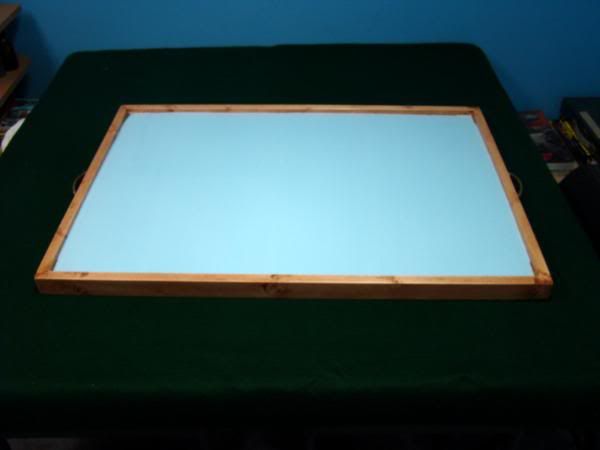
In the end I ran out of time and I gave the entire board a quick coat of brown paint to match the army somewhat. In hind site I should have left the border black but it got painted with everything else. Once that dried I was literally gluing railroad ballast to the board the night before the tournament. In the morning it was dry and I ended up putting it in the back of my truck for the trip to the venue so that the smell would get dissipated by the air flow. Here is the end result:
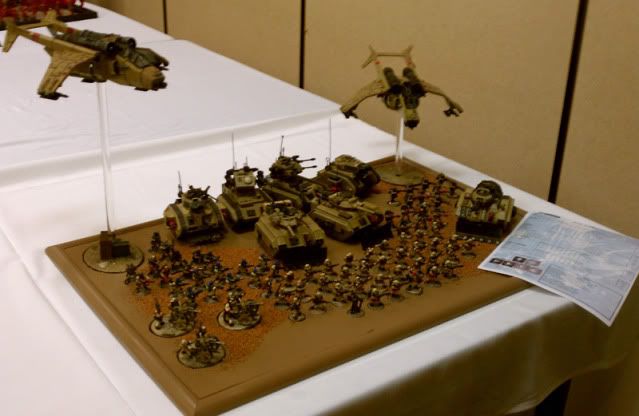
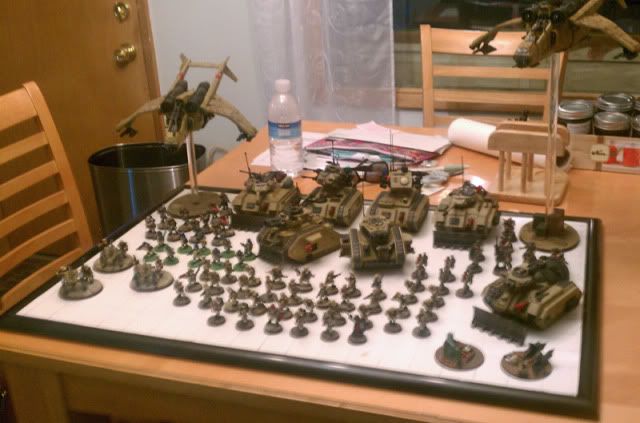
I think that while the process of cutting all those holes was super painful, it was worth it in the end. The models sit flat in the board and the ballast helps to tie it all in. Instead of having a bunch of bases on top of the board it looks like they are part of the board. Even though I can't use the board with other configurations of the army, I can change the vehicles but not the infantry very easily because of all the holes, I still think it was a great place to start with my first board and I learned allot for the next one!
still practicing_
Tallarn
Did you use a drill to cut all of the holes for the infantry or did you use a hobby knife?
ReplyDeleteI used a bobby knife, took about 2 hours to get them all cut out.
ReplyDeleteLooks great, will be using this idea for my guard once they are finished :)
ReplyDeleteFor the different load outs, could you not Velcro the foam core and the backing board to allow you to change them over? Means a lot more hole cutting though :(
Keep up the good work, looking forward to seeing more.
great idea... simple too.
ReplyDeletehowever my laziness would have me using a hole making drill bit (pretty sure I have one the right size).
will definitely put this on my to do list
Thanks guys, I did try a drill at first but found if left the edges too rough, you might want to try it on a small piece first...
ReplyDelete